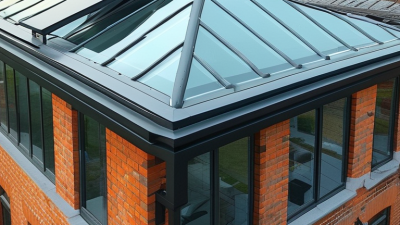
Choosing flat roof lanterns is not simply a matter of selecting the largest glass roof available. The right design must balance daylight, thermal performance, ventilation, structure, and visual proportion. A lantern that looks impressive in a showroom may create overheating beside a south-facing wall. It may also expose weaknesses in the existing roof.
Industry research supports this careful approach. The Mordor Intelligence Skylights Market report identifies energy efficiency, natural lighting, and improved indoor comfort as major drivers across the skylight sector. The UK Government’s English Housing Survey also highlights how condensation, dampness, and ventilation affect everyday housing performance. These findings matter when comparing glass specifications, opening vents, roof insulation, and installation quality.
David Hirst, technical director at Ultraframe, has described the practical goal this way: “A roof lantern should bring light into a room without compromising comfort.” That principle sounds obvious. It is often missed.
A strong choice begins with accurate measurements and honest expectations. Consider the room’s orientation, ceiling height, roof pitch, frame material, glazing coating, and drainage details. Ask how the lantern performs on a bright July afternoon, not only on a grey winter morning. Check U-values, solar-control figures, safety glass, warranty terms, and installer credentials. Independent certification can provide useful reassurance, but it does not replace site-specific judgment.
There is no perfect lantern.
Some designs maximise brightness but increase solar gain. Others improve insulation while reducing the crisp, open appearance homeowners want. This guide examines those compromises, using practical experience and current technical guidance to help you choose flat roof lanterns with greater confidence.
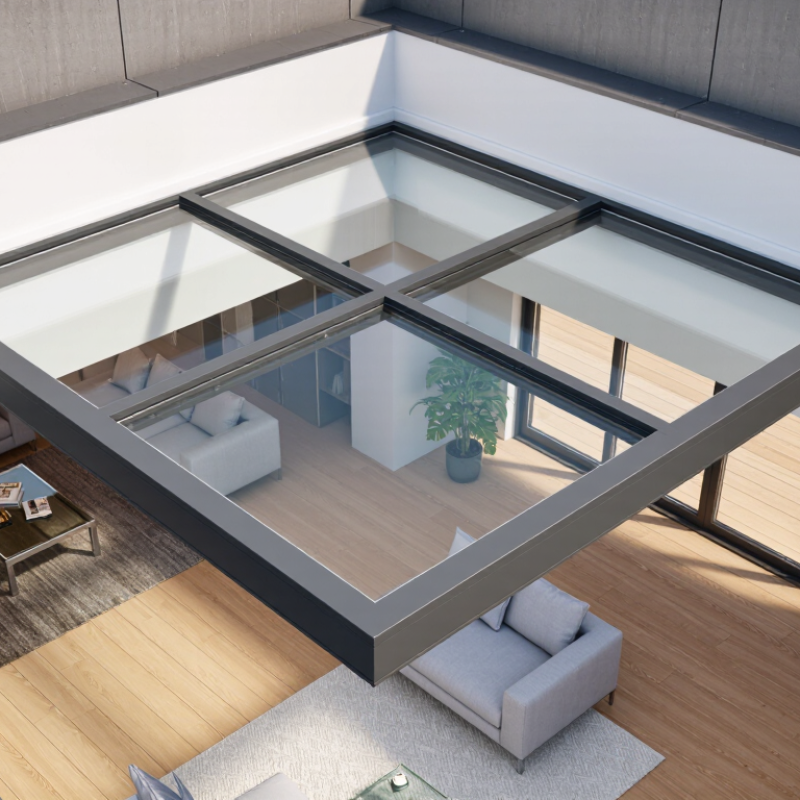
Before comparing flat roof lanterns, define what your roof actually needs. Measure the roof opening, ceiling height, and available daylight area carefully. A small room may need a compact lantern, while a wide kitchen can support a larger glazed structure. Do not estimate from floor size alone. Wall height, furniture placement, and nearby buildings also affect the light.
Check the roof’s pitch, drainage route, and structural capacity with a qualified installer. Flat roofs still need effective water movement around the lantern frame. Ask whether the existing roof can carry the additional weight without reinforcement. Consider glazing performance too. Low-emissivity glass can reduce heat loss, while solar-control glass may limit overheating on south-facing roofs. Ventilation is easy to overlook. Opening sections can release warm air, especially in rooms with high ceilings.
Think about daily use, not only appearance. A fixed lantern suits a room needing simple daylight and minimal maintenance. An opening lantern may be better for kitchens, bathrooms, or spaces without windows. Decide how you will clean the external glass. Safe access matters. So does the sound of heavy rain.
My first measurements were too optimistic. Roof edges, rafters, and internal plaster reduced the usable opening. Leave practical clearance for flashing, insulation, and installation tolerances. Set a realistic budget that includes fitting, internal finishing, blinds, and future maintenance. A cheaper specification may look attractive, but poor thermal performance can become expensive over time. Ask for written performance data and installation details, then compare them with your building’s actual conditions.
| Requirement Area | What to Define | Typical Requirement or Range | Why It Matters | Selection Check |
|---|---|---|---|---|
| Roof Opening Size | Measure the structural opening, not only the external roof finish. | Common domestic layouts range from approximately 1.0 m × 1.0 m to 3.0 m × 2.0 m. Larger openings may require multiple units or structural support. | Accurate dimensions prevent fitting problems, excessive trimming, and water-ingress risks. | Confirm finished opening dimensions and allowable manufacturing tolerances. |
| Natural Light | Decide how much daylight the room needs and whether the lantern is the primary light source. | A glazed roof area of roughly 10–20% of the floor area is often considered a useful starting point for daylight planning, subject to room depth, orientation, and surrounding buildings. | Too little glazing can leave the room dark; too much can increase glare and solar heat gain. | Review daylight, glare, and overheating together rather than choosing the largest available lantern. |
| Thermal Performance | Set the target U-value for the complete rooflight assembly, including frame and glazing. | For energy-conscious projects, a whole-product U-value around 1.0–1.6 W/m²K is a practical target; the required value depends on local regulations and the building design. | Lower U-values reduce heat transfer and can improve winter comfort and energy efficiency. | Ask for certified whole-unit performance, not glazing-only figures. |
| Glazing Type | Choose between clear, solar-control, laminated, toughened, or multi-layer insulated glazing. | Double glazing is common for many residential applications; triple glazing may be selected for higher thermal performance. Laminated inner glazing improves overhead safety. | Glazing affects daylight, safety, acoustic comfort, weight, heat gain, and cost. | Check safety-glazing classification and the declared solar-control performance. |
| Roof Pitch | Confirm the lantern design is suitable for the existing flat-roof build-up and drainage direction. | Many lantern systems use sloping glazing faces, commonly around 20–35 degrees, while the supporting flat roof must have adequate falls for drainage. | Correct falls reduce standing water, dirt accumulation, and leakage risk. | Verify the roof falls, kerb height, and minimum installation pitch before ordering. |
| Kerb and Flashing | Define the kerb material, height, width, insulation detail, and waterproofing interface. | A raised kerb is typically detailed above the finished roof surface; the exact height and flashing method must follow the roof system and local practice. | The kerb is a critical part of the weatherproof connection between roof and lantern. | Coordinate the lantern detail with the waterproofing contractor before installation. |
| Ventilation | Decide whether the room requires background ventilation, purge ventilation, or smoke ventilation. | Options may include manually operated vents, electric actuators, rain sensors, or automated controls. Ventilation requirements should be calculated for the room and building type. | Ventilation helps manage condensation, indoor air quality, and summer overheating. | Do not assume a vented lantern alone satisfies all building ventilation requirements. |
| Solar and Glare Control | Assess orientation, shading, room use, and the need for blinds or solar-control glass. | South- and west-facing rooflights generally require more attention to solar gain than north-facing installations. External shading is usually more effective than internal blinds. | Good solar design improves comfort and reduces cooling demand. | Request the solar factor (g-value) and visible light transmittance of the proposed glazing. |
| Structural Loads | Provide the project location, building height, exposure, snow conditions, and wind environment. | The lantern must be checked for site-specific wind and snow loads; these values vary significantly by region, altitude, and building geometry. | Correct load assessment protects the frame, glazing, fixings, and supporting roof structure. | Obtain structural calculations where the opening is large or the site is exposed. |
| Safety and Access | Define cleaning access, maintenance routes, fall protection, and accidental-impact requirements. | Use safety glazing where required and plan safe access for cleaning and inspection; never rely on the rooflight as a walking surface unless specifically designed for that purpose. | Overhead glazing requires careful consideration of breakage, maintenance, and worker safety. | Confirm compliance with applicable construction and workplace-safety regulations. |
| Acoustic Comfort | Identify nearby traffic, aircraft, rain exposure, mechanical equipment, or other noise sources. | Acoustic performance depends on the complete glazing build-up; laminated and asymmetric insulated glazing can improve sound reduction compared with basic glass combinations. | Rain noise and external sound can be noticeable through overhead glazing. | Request a tested weighted sound-reduction value where acoustic performance is important. |
| Frame Material and Finish | Choose the frame material, colour, corrosion resistance, and visual profile. | Thermally broken aluminium is widely used for slim, durable frames; timber and composite options may be selected for different aesthetic or thermal requirements. | The frame influences durability, appearance, thermal bridging, and maintenance. | Check coating quality, drainage paths, thermal-break details, and finish warranty terms. |
| Building Regulations | Identify the applicable requirements for energy, ventilation, fire safety, structural design, and safety glazing. | Requirements differ by country and project type. Replacement work, extensions, and new-build projects may be subject to different approval procedures. | A visually suitable lantern may still fail compliance or approval requirements. | Confirm the specification with the designer, building-control body, or relevant local authority. |
| Budget and Installation | Set the total budget for the lantern, structural alterations, kerb, waterproofing, electrical controls, access, and finishing work. | Installation cost can vary substantially with size, roof access, glazing weight, structural changes, ventilation controls, and internal finishing requirements. | The product price is only one part of the complete project cost. | Obtain an itemised quotation and confirm lead time, delivery access, installation sequence, and maintenance responsibilities. |